Quick Campaign
Using the Quick Campaign feature is the easiest and quickest way to get started emailing. Follow the directions below to get started.
-
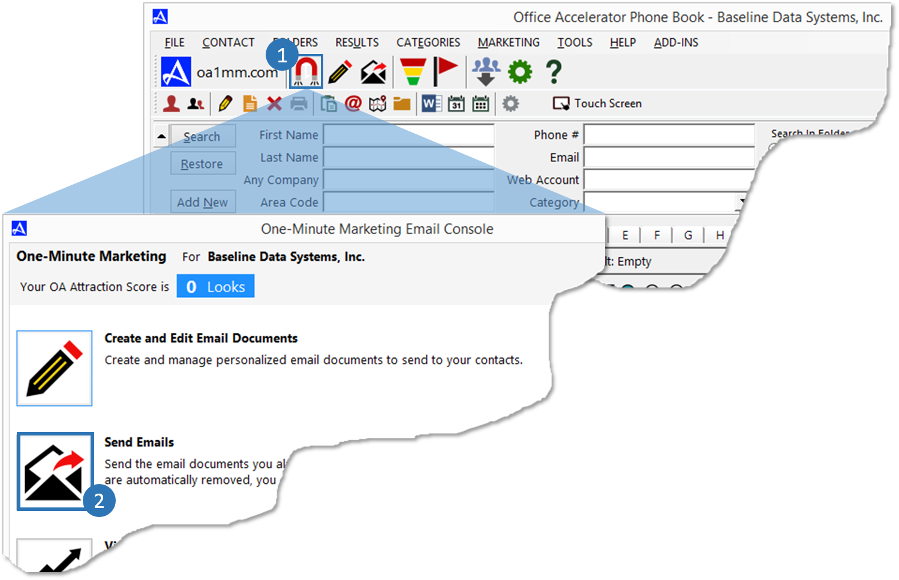
Open the Accelerator phone book and launch the |Marketing Email Console|. Click the button entitled |Send Emails|.
-
Review the |How it Works| section and click the |Next| button to continue.
To turn off the 'How it Works' step, check the box entitled |Skip this Step in the Future|.Sending emails using campaigns enables Office Accelerator to record and provide you details on who did what and when. A campaign consists of a single email sent to one or more lists of contacts. Any contacts that have unsubscribed or have already received the email from a given campaign are automatically removed. All activities are tracked, including who clicked on your links in the email, opened the email, unsubscribed, and more. An email notification of a contact’s activity is sent to you the moment the activity happens, allowing you to immediately follow up with the contact one-on-one while the contact is potentially interested in your product or service. -
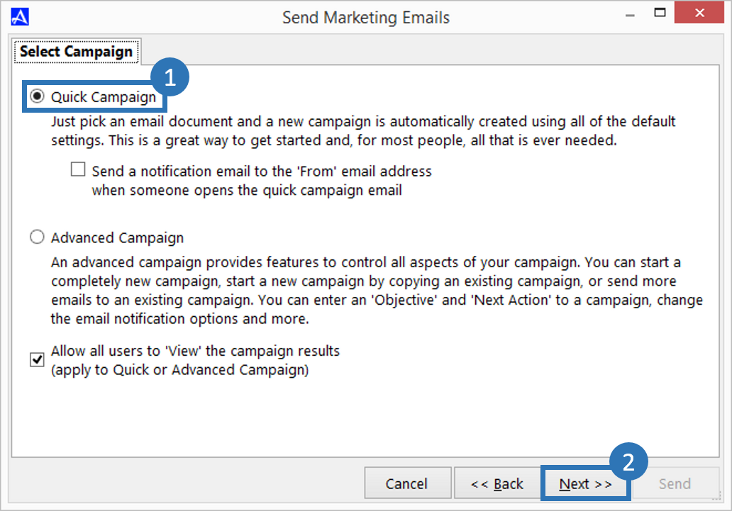
Make sure the |Quick Campaign| option is selected, then click the |Next| button.
 Checking the box entitled |Send a notification email to the 'From' email address when someone opens the quick campaign email| will send a notification to 'You' each time a recipient opens your email. This is generally not desirable, as it is not a good indication that a recipient has shown interest in your message, service, or product. Even if this box is 'not' checked, you will still receive notifications when recipients [Insert Here].
 -
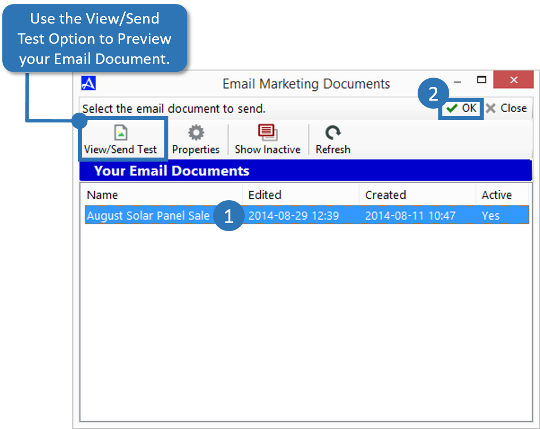
From the |Email Marketing Documents| screen, select the email document you would like to send to your recipients, then click the |OK| button.
-
From the |Select Contacts| screen, click the |Add| drop down to select which list of contacts you would like to email, then click the |Next| button.
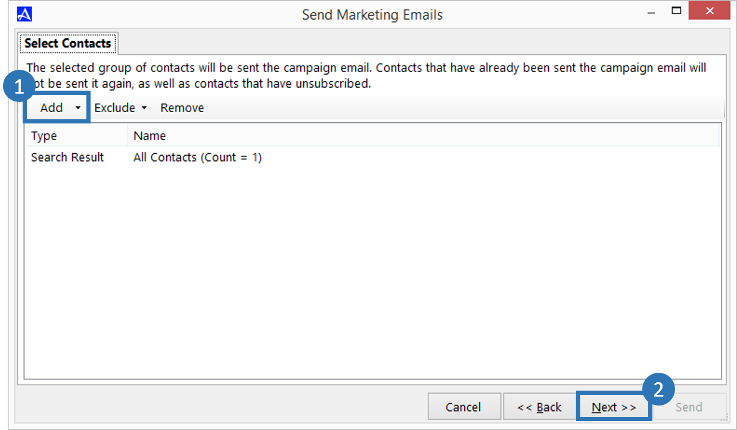 You can send your email to a selected folder or list, category, mailing list folder, marketing website folder, results of a previous campaign, or the current search result or selected contact. To exclude specific lists from the mailing, click the |Exclude| button. You can exclude contacts within folders or lists, categories, mailing list folders, marketing web site folders, and sent email campaign results. To remove any selected item, highlight it and click the |Remove| button.Note that contacts that have already been sent the campaign email will not be sent it again. While you can send the same email to the same recipients again, that same email must be part of a new campaign.
 -
Verify your contact selections and click the |Next| button.

-
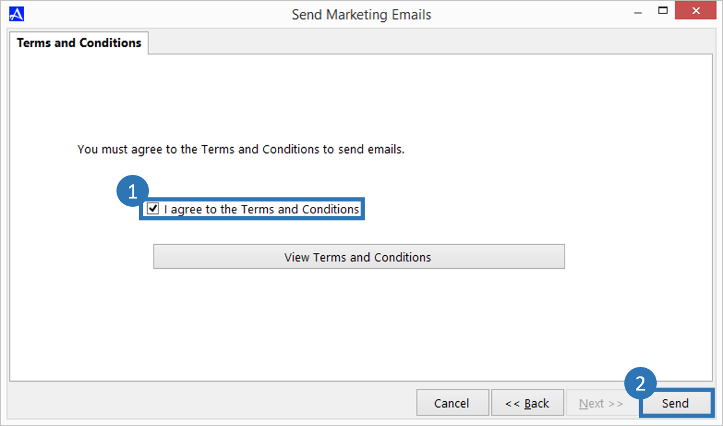
Place a check in the terms and conditions box, then click the |Send| button to begin sending your emails.
-
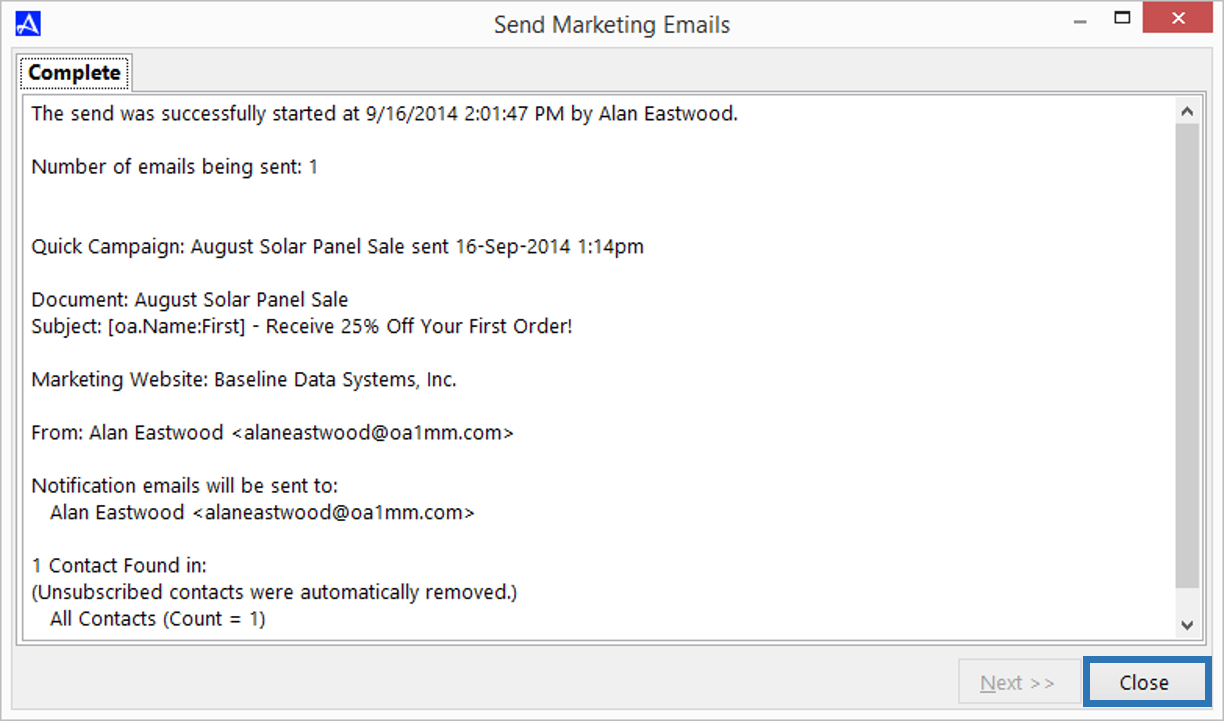
Review the sent email summary screen. Click the |Close| button to close the Quick Campaign Wizard.