Create Edit Envelope Format
Office Accelerator includes a powerful add-in called the Accelerator Macro Suite (AMS). To create a customized merge envelope in Office Accelerator using AMS, follow the directions below.
Creating Your New Merge Envelopes
-
Open the Office Accelerator phone book and click the |Tools| menu, then select |Word Processor| to open Microsoft Word.
If word doesn't open via |Tools|Word Processor|, see Word Processor Path. -
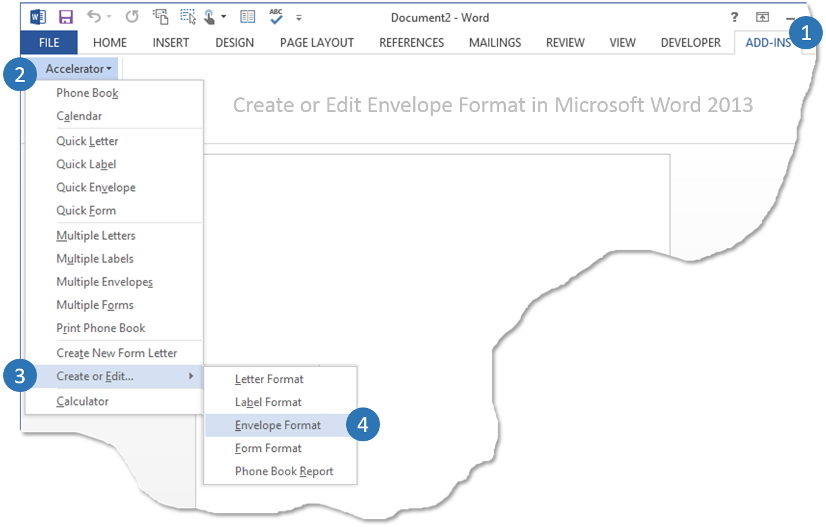
From your Word document, click the |ADD-INS| tab, then click |Accelerator|Create or Edit|Envelope Format|.
-
The |Envelope Document Formats| dialog box provides the pre-defined envelope merge documents that ship with Office Accelerator. When you design a custom envelope template, you will start by selecting one of these pre-defined formats. In this example we'll use the 'Size 10' envelope document , select the |Size 10 (4-1/8 x 9-1/2)| envelope type then click the |Create New| button. Enter a unique name for your new custom envelope format, in this example we'll call it 'Size 10 Custom Envelope' then click the |OK| button. ,
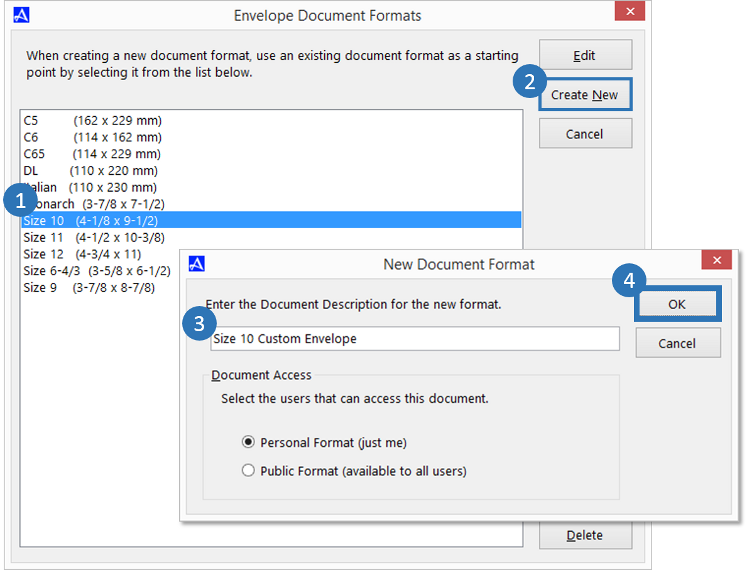 By default, your new envelope document will be created for use by just you (Personal Format), however if you would like to share the envelope document with other Accelerator users, select the |Public Format|. Click the |OK| button to save your selections. Public format documents are stored in the location determined by your user defined public documents path. This path should point to the same location for each Office Accelerator user within your account e.g. \\shared\oadocs\ etc. Public Documents are available to those users with appropriate user rights.
 -
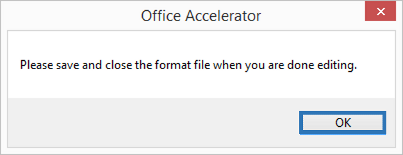
Click |OK| to the message reminding you to save your changes.
-
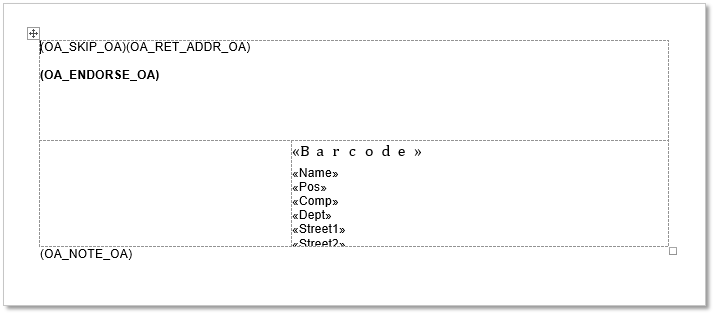
Office Accelerator will now display your envelope merge document in Word.
-
The Accelerator envelope merge document is just like any Word document in that you can add and delete text and images as well as modify the formatting and layout of the document. What makes this document unique is that it contains merge and substitution fields which are used to insert information from Office Accelerator into your envelope. You decide what and where in your document information from Accelerator will be merged by placing merge and substitution fields in the desired location.
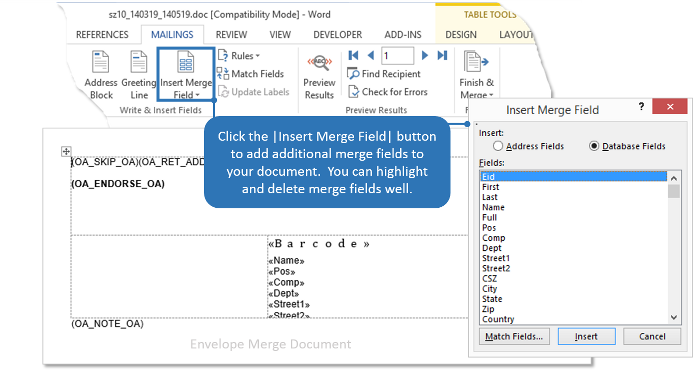 Substitution fields are surrounded by ( ) characters and merge fields by << >> characters.
 -
In the example below, we have removed some of the merge fields and changed the font type and size on our envelope. Once you have completed modifying 'your' envelope, be sure and click the |Save| button, then close the merge document.
 Because the merge document contains special attributes that work with Accelerator, be sure NOT to change the name or location of your envelope document. Simply press the |Save| button in Word to save your changes.
| EID | Merges Unique identifier contact value |
| First | Merges first name field value |
| Last | Merges last name field value |
| Name | Merges 'Addressee' GUI value |
| Full | Merges Title, First, Middle, Last, Post |
| Pos | Merges position field value |
| Comp | Merges company field value |
| Dept | Merges department field value |
| Street1 | Merges street 1 field value |
| Street2 | Merges street 2 field value |
| CSZ | Merges City, State and Zip field values |
| City | Merges City field value |
| State | Merges State field value |
| Zip | Merges Zip field value |
| Country | Merges Country field value |
| Salutation | N/A |
| PhoneF | Merges the Fax number value |
| PhoneB | Merges the Business number value |
| Barcode | Merges the barcode font (this bulk mail method is deprecated) |
| Search 1 | Legacy Field (no longer used but reserved) |
| Search 2 | Legacy Field (no longer used but reserved) |
| Search 3 | Legacy Field (no longer used but reserved) |
| Custom# | Merges Custom Fields 1 - 160 (160 = max allowable custom field merge value) |
Using Your New Custom Envelope
-
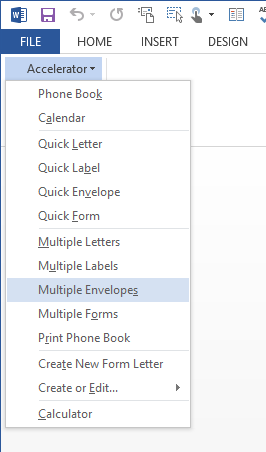
To use the new custom envelope document you created above, open Microsoft Word and click |Accelerator|Multiple Envelopes| located under the |Add-Ins| tab.
-
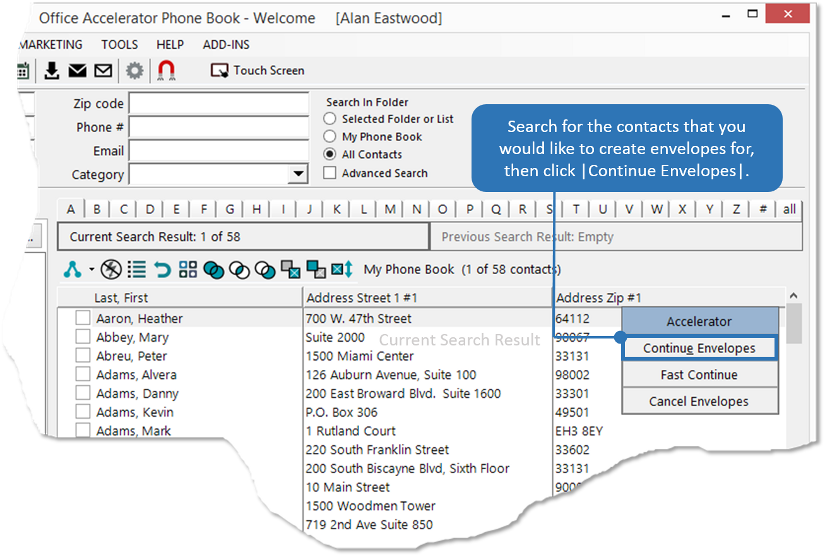
The Accelerator menu will return you to the Accelerator phone book where you can search for the contacts you would like to create envelopes for. Click the |Continue Envelopes| button to proceed, all contacts in the current search result will be merged to your 'Size 10 Custom Envelope' document.
-
There are 8 sections in the |Multiple Envelopes Options| screen. The |Multiple Envelopes Options| screen corresponds to the merge fields in your 'Size 10 Custom Envelope' merge document. In Section - 1, entitled |Envelope Format| we need to select |Size 10 Custom Envelope| as this is the merge document we created above. In addition, we'll use the return address in Section - 4 and in Section - 5 the recipient name <Full Name> format which is Title, First, Middle, Last & Post. By default, the name and company are used in the recipients return address, but you can change these options in Section - 6. Click the |Continue| button to proceed to the next step.
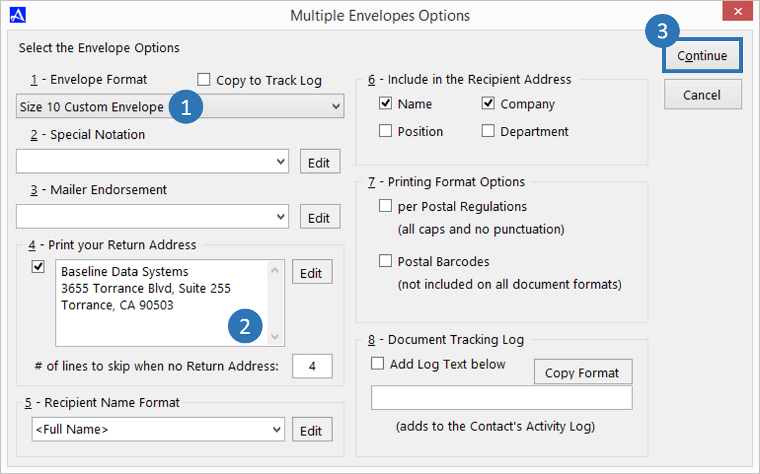 Section - 2 is used for special notations such as certified, or air mail. Section - 3 is used for mailer endorsements such as address correction requests, do not forward, etc. Section - 7 is used for postal printing formats and bar-code fonts (As of 2013, these formats are no longer used by USPS). Section - 8 provides the option to include a notation in the contact log for each contact you are making an envelope for, you can use the copy format button to copy the name of the custom document into the tracking log section (size 10 custom envelope) or enter your own text.
 -
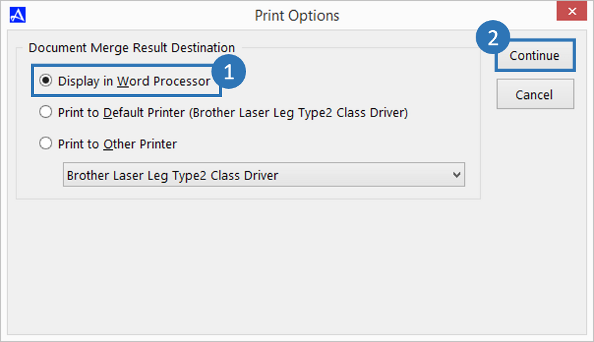
By default, your 'Size 10 Custom Envelope' will be sent to your word processor. Typically, you'll want to use the |Display in Word Processor| option so you can view your envelopes prior to printing in the event you need to make changes. You can also print the envelopes directly to your default printer or select an alternate printer. Accelerator will merge all of the contacts that are in the current search result to your envelopes document, however, you can use the range option and designate a specific range of contacts to merge from the current search result. Make sure the |Display in Word Processor| option is selected and click the |Continue| button.
-
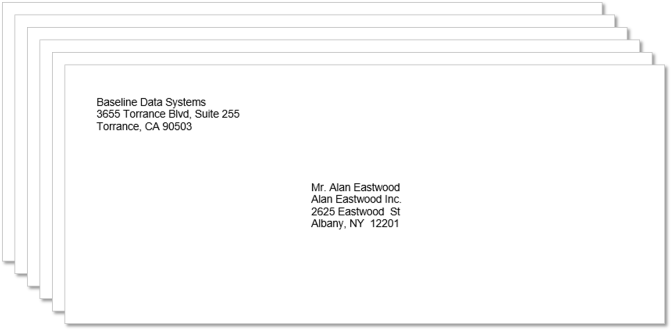
When the merge in complete, your 'Size 10 Custom Envelopes' will be created in Word. Each contact in the current search result will be merged to your 'Size 10 Custom Envelopes' where it can then be printed.
Substitution & Merge Fields
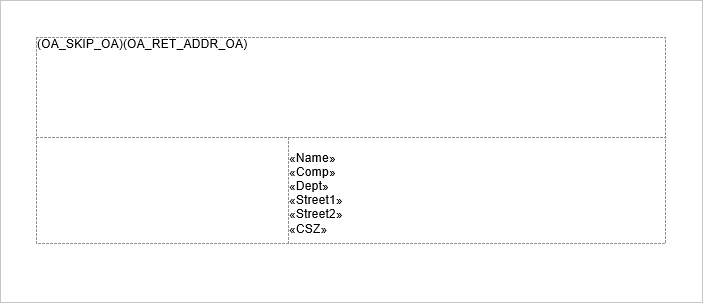
| (OA_SKIP_OA) | Used to denote number of lines to skip when no return address is used |
| (OA_RET_ADDR_OA) | Inserts selected return address |
| (OA_ENDORSE_OA) | Inserts specified value such as 'address correction requested', 'do not forward', etc. |
| (OA_NOTE_OA) | Inserts specified value such as 'Air Mail', 'Express Mail', 'First Class', etc. |
| << Barcode >> | Inserts Postal Barcode Fonts (Deprecated - Barcodes no Longer Used by USPS) |
Envelope Formats that Ship with Accelerator
| Size 6-4/3 (3-5/8 x 6-1/2) |
| Size 9 (3-7/8 x 8-7/8) |
| Size 10 (4-1/8 x 9-1/2) |
| Size 11 (4-1/2 x 10-3/8) |
| Size 12 (4-3/4 x 11) |
| Monarch (3-7/8 x 7-1/2) |
| DL (110 x 220 mm) |
| C5 (162 x 229 mm) |
| C6 (114 x 162 mm) |
| C65 (114 x 229 mm) |
| Italian (110 x 230 mm) |