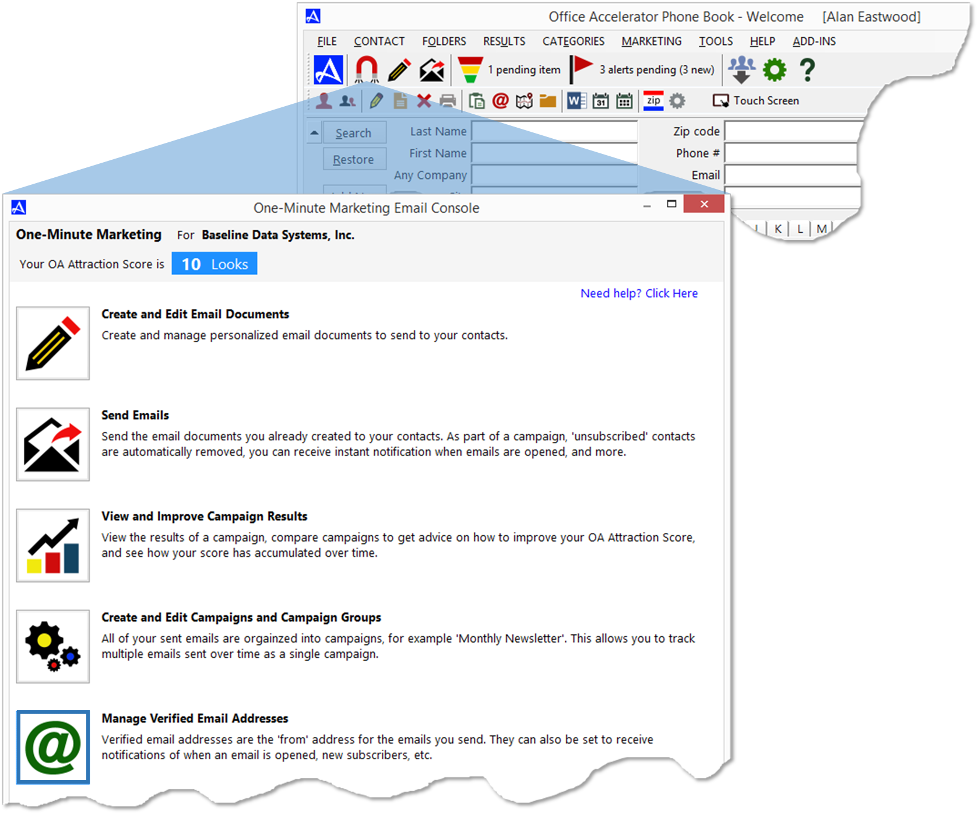
Manage Verified Email Addresses
The |Manage Verified Email Addresses| option is used to add, remove, and manage email addresses associated with Accelerator Email Marketing. To access these feature, from the Accelerator phone book, click the |Marketing| menu and select |Email Marketing Console| or click the |Email Marketing Console| button on the Marketing Tool Bar. Next, click the button entitled, |Manage Verified Email Addresses|.
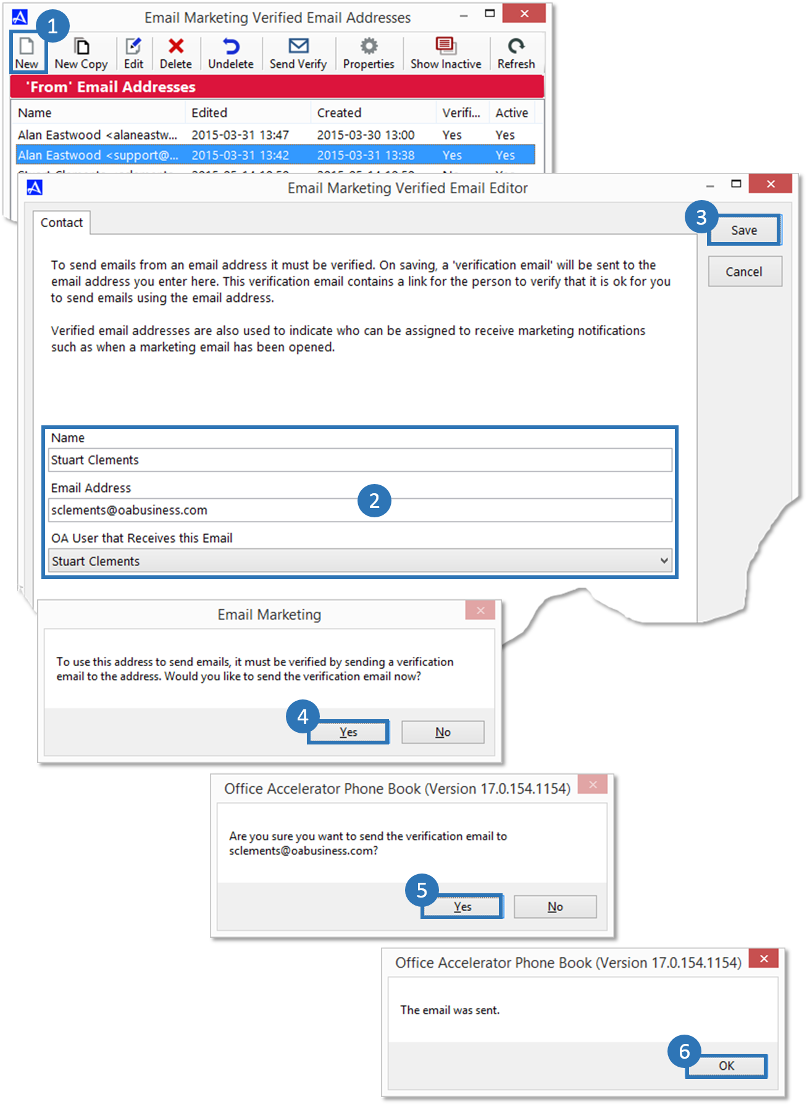
Add New Email Address for use with Email Marketing
To add a new email address for use with Accelerator email marketing, from the |Email Marketing Verified Email Addresses| screen click the |New| button and enter a name and email address then select an Accelerator user that the new email address will be associated with. Click the |Save| button and confirm the email address creation. Next, check your email and verify the email address, you will not be able to use the email address with Accelerator Email Marketing until the email address has been verified.
New Copy
You can use the |New Copy| button to copy the attributes of an existing verified email address.

Edit (Unverified Email Addresses)
Use the |Edit| button to modify unverified email addresses.

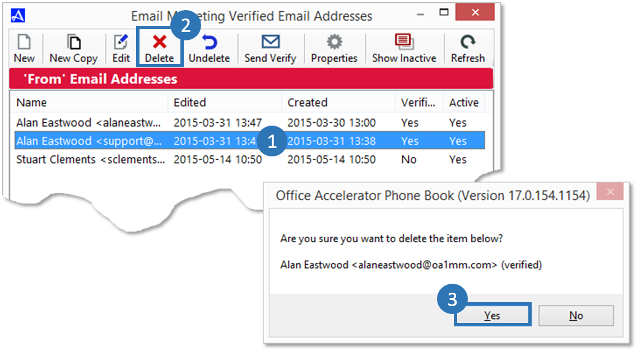
Delete (Verified or Unverified Email Addresses)
To delete a verified or unverified email address, highlight the email address you would like to delete then click the |Delete| button.
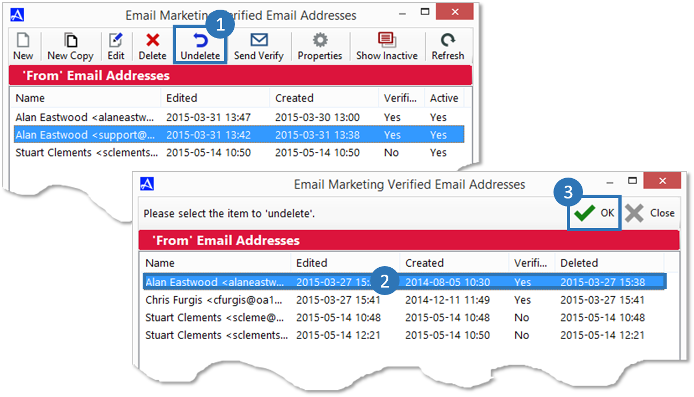
Undelete (Verified or Unverified Email Addresses)
To undelete a verified or unverified email address, click the |Undelete| button, select the email address you would like to undelete then click the |OK| button.
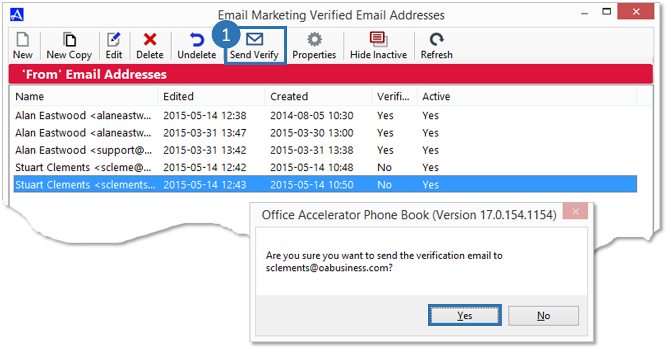
Send Verify
To resend the verification email, select the unverified email address then click the |Send Verify| button. Click |Yes| to confirm the action.
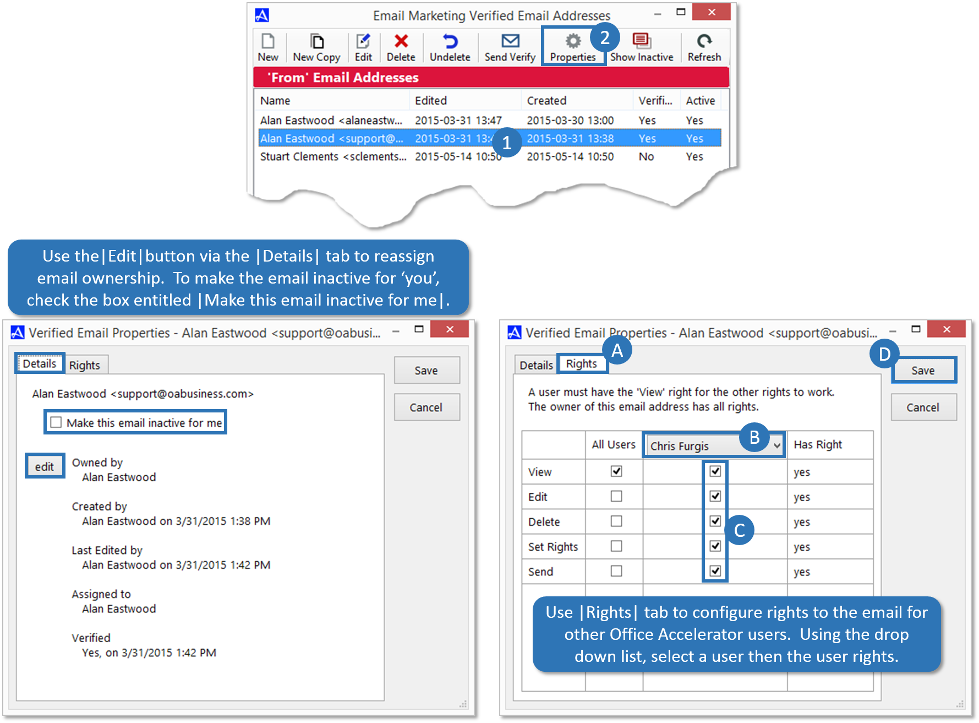
Email Properties
The |Properties| button provides owner, create by, last edited by, assigned to, verified information and the ability to make an email address inactive via the |Details| tab for the selected email. From the |Details| tab, you can change email ownership by clicking the |Edit| button and selecting a new owner (multi-user environment only). The |Rights| tab provides the ability to add or remove 'View', 'Edit', 'Delete', 'Set Rights' and 'Send' rights for other Office Accelerator users. To modify rights for a user, click the |Rights| tab, select a user from the drop down and assign the appropriate rights. Click the |Save| button to save your settings. By default, the email address owner has full rights.
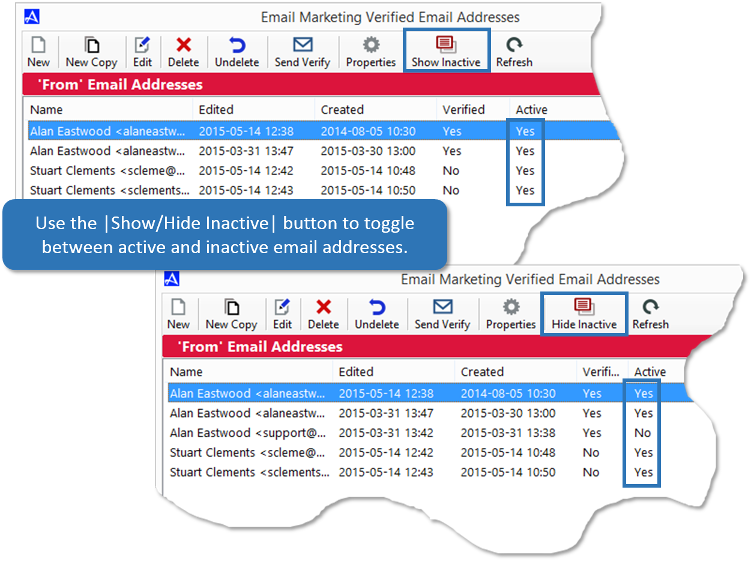
Show Inactive
Use the |Show/Hide Inactive| toggle button to view and hide inactive email addresses (email addresses can be made inactive via Properties).
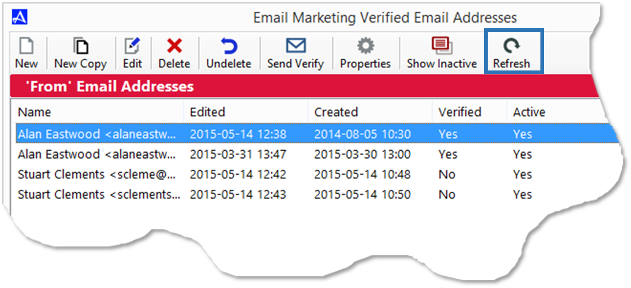
Refresh
Use the |Refresh| button to refresh the email address screen to display the most recent changes (useful in a multi-user environment).