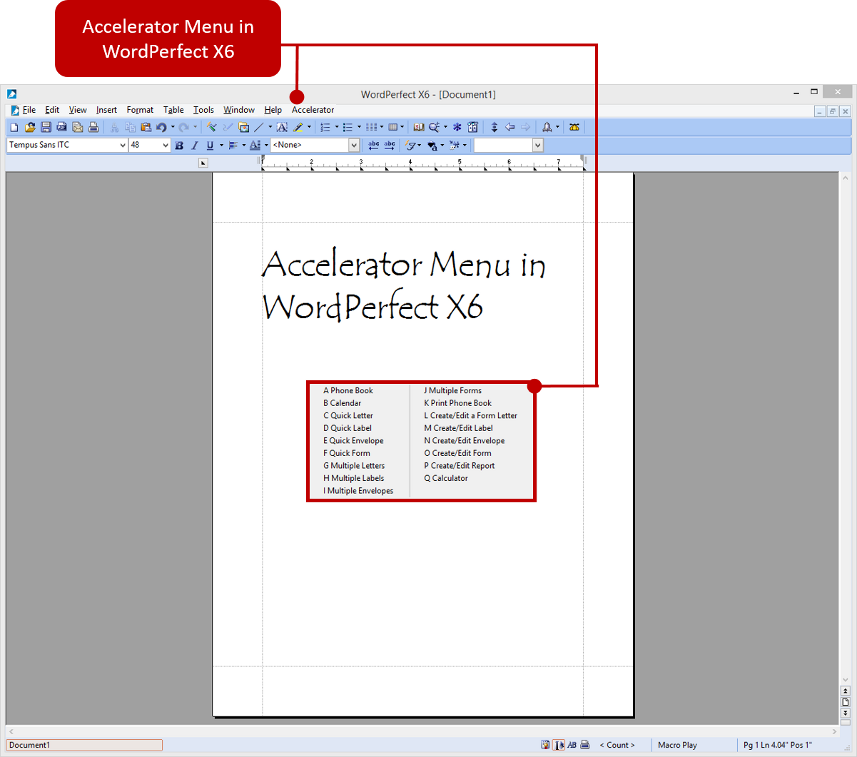
Adding the Accelerator Menu in WordPerfect
Now that you've installed the Accelerator Macro Suite files, you'll need to add the Accelerator menu to WordPerfect. To do this, follow the directions below.
-
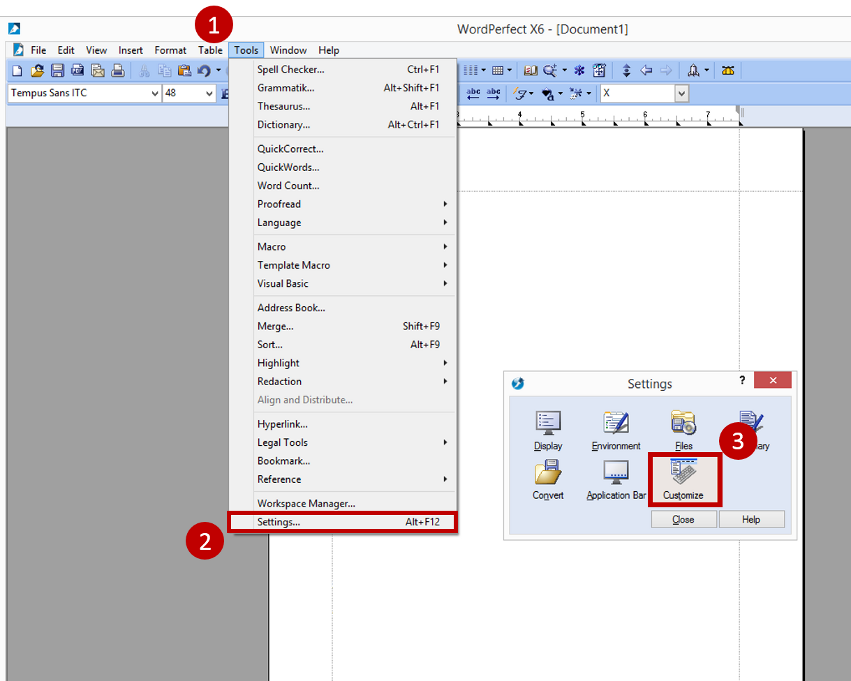
Open Corel WordPerfect and select |Tools|Settings|Customize|.
-
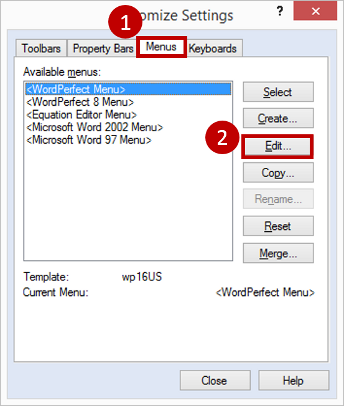
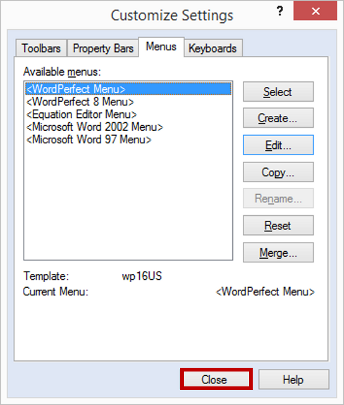
From the |Customize Settings| dialog box, select the |Menus| tab then click the |Edit| button.
-
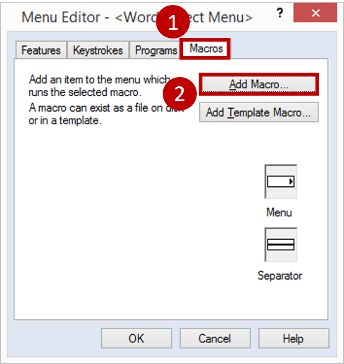
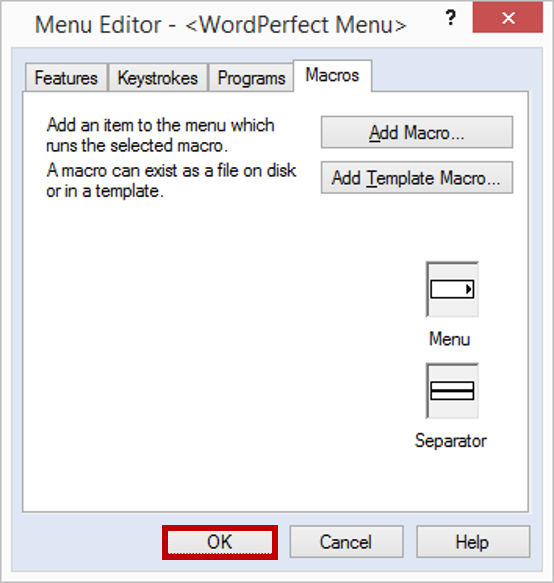
From the |Menu Editor| dialog box, click the |Macros| tab, then click the |Add Macro| button.
-
From the |Select Macro| dialog box, highlight the |Accelerator.wcm| file and click the |Select| button.
Note: If you do not see the Accelerator.wcm file, your default WP macro directory has been changed. To remedy this, navigate to C:\Program Files\Baseline Data Systems\Office Accelerator\WPMacros and copy the Accelerator.wcm file to 'Your' macro directory. Once the file has been copied, start again with the instructions on this page to integrate the Accelerator menu to Wordperfect.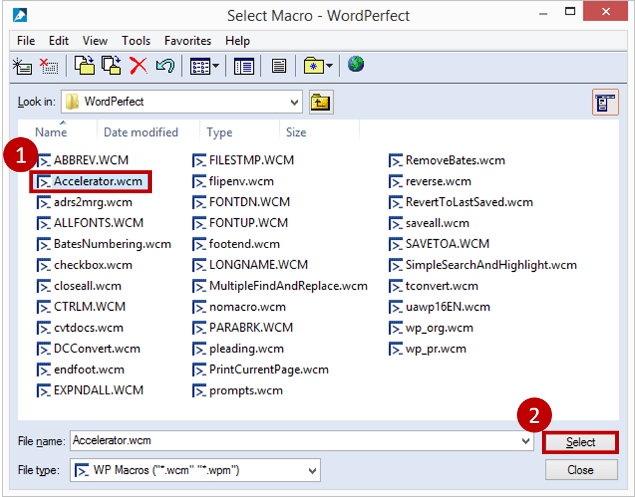
-
When prompted to |Save macro with full path|, select |No|.

-
From the |Menu Editor| screen click the |OK| button.
-
From the |Customize Settings| screen, click |Close|.
-
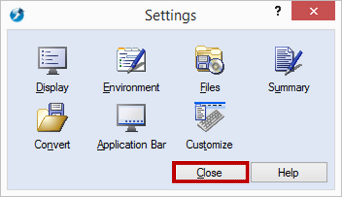
From the |Settings| dialog box, select |Close|.
-
The Accelerator menu installation in WordPerfect is complete.