Create Edit Label Format
Office Accelerator includes a powerful add-in called the Accelerator Macro Suite (AMS). To create a customized merge label in Office Accelerator using AMS, follow the directions below.
Creating Your New Merge Labels
Open the Office Accelerator phone book and click the |Tools| menu, then select |Word Processor| to open Microsoft Word.
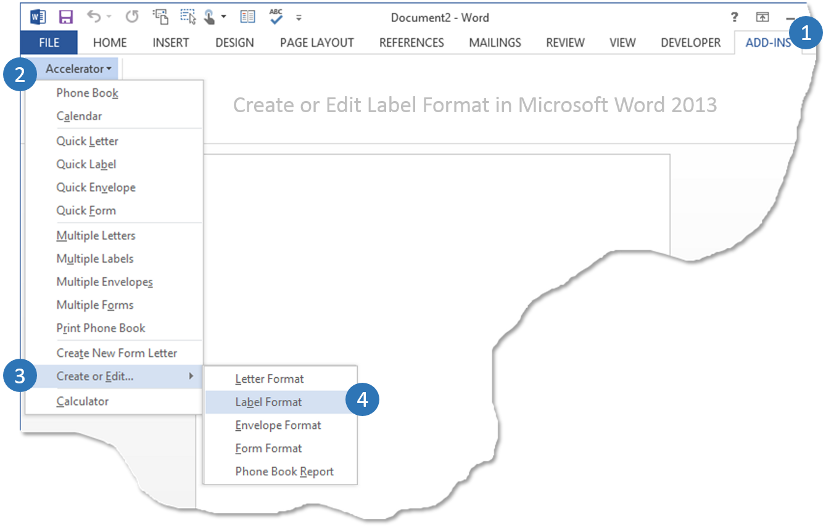
If word doesn't open via |Tools|Word Processor|, see Word Processor Path.From your Word document, click the |ADD-INS| tab and click |Accelerator|Create or Edit|Label Format|.
 If you don't have an Accelerator menu, see Adding the Accelerator menu to Word.
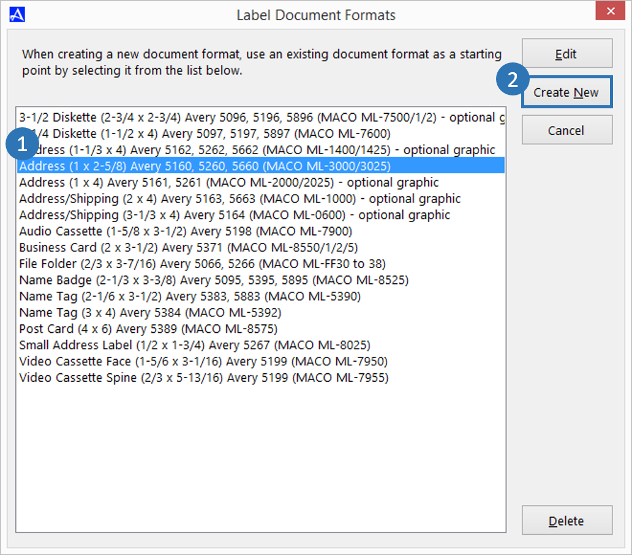
The |Label Document Formats| dialog box provides the pre-defined label merge documents that ship with Office Accelerator. When you design a custom label template, you will start by selecting one of these pre-defined formats. In this example we'll use the Avery 5160 label type, select the |Avery 5160| label type then click the |Create New| button.
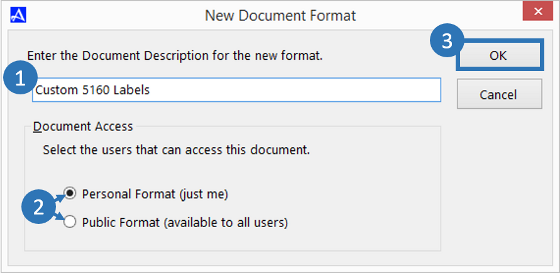
You will need to provide a unique name for your new custom label format, in this example we'll call it 'Custom 5160 Labels'. By default, your new label document will be created for use by just you (Personal Format), however if you would like to share the label document with other Accelerator users, select the |Public Format|. Click the |OK| button to save your selections.
 Public format documents are stored in the location determined by your user defined public documents path. This path should point to the same location for each Office Accelerator user within your account e.g. \\shared\oadocs\ etc.Public Documents are available to those users with appropriate user rights.
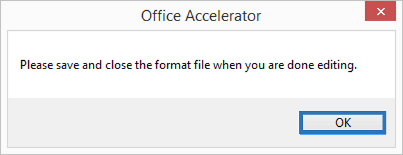
Click |OK| to the message reminding you to save your changes.
Office Accelerator will now display your merge label document in Word.
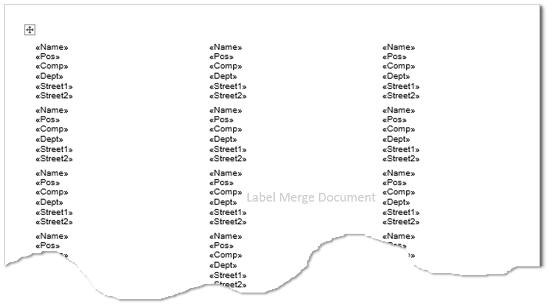
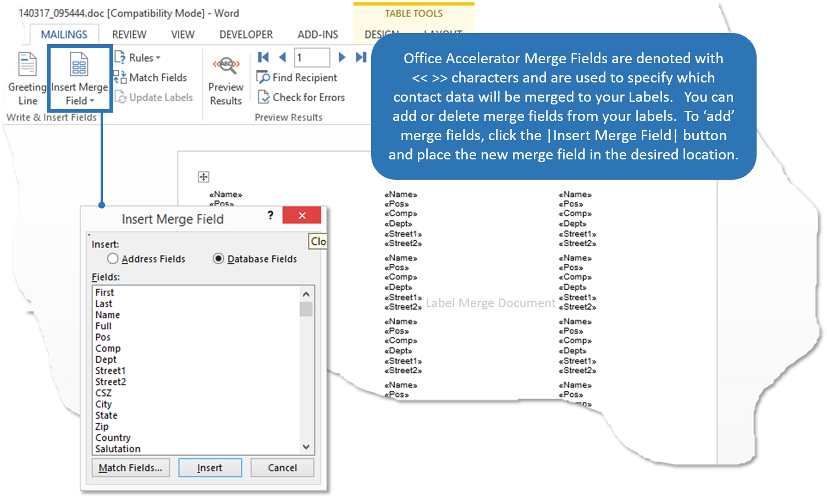
The Accelerator merge label document is just like any Word document in that you can add and delete text and images as well as modify the formatting and layout of the label document. What makes this label document unique is that it contains merge fields which are used to insert information from Office Accelerator into your labels. You decide what and where in your document information from Accelerator will be merged by placing merge fields in the desired location.
 Because labels have very little space to work with, you'll need to be conservative when adding text and/or images.
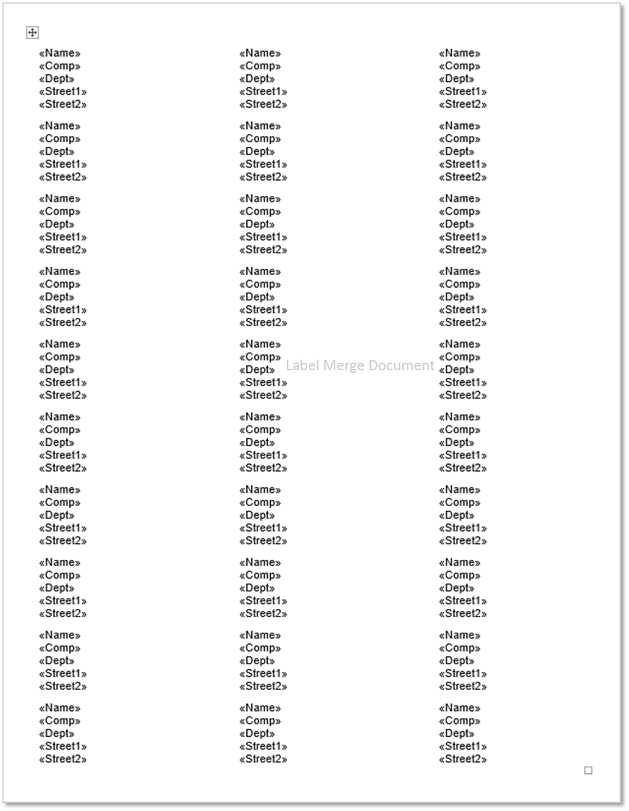
In the example below, we have removed some of the merge fields and changed the font type and size on our labels. Once you have completed modifying 'your' labels, be sure and click the |Save| button, then close the merge document.
 Because the merge document contains special attributes that work with Accelerator, be sure NOT to change the name or location of your label document. Simply press the |Save| button in Word to save your changes.
OAM Available Merge Fields Available Merge Fields Definition EID Merges Unique identifier contact value First Merges first name field value Last Merges last name field value Name Merges 'Addressee' GUI value Full Merges Title, First, Middle, Last, Post Pos Merges position field value Comp Merges company field value Dept Merges department field value Street1 Merges street 1 field value Street2 Merges street 2 field value CSZ Merges City, State and Zip field values City Merges City field value State Merges State field value Zip Merges Zip field value Country Merges Country field value Salutation N/A PhoneF Merges the Fax number value PhoneB Merges the Business number value Barcode Merges the barcode font (this bulk mail method is deprecated) Search 1 Legacy Field (no longer used but reserved) Search 2 Legacy Field (no longer used but reserved) Search 3 Legacy Field (no longer used but reserved) Custom# Merges Custom Fields 1 - 160 (160 = max allowable custom field merge value) Using Your New Custom Labels
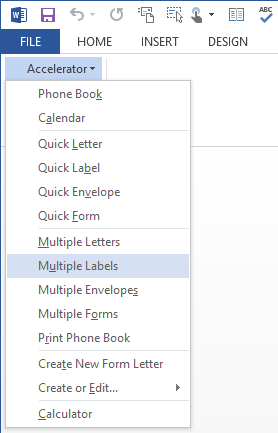
To use the new custom label document you created above, open Microsoft Word and click |Accelerator|Multiple Labels| located under the |Add-Ins| tab.
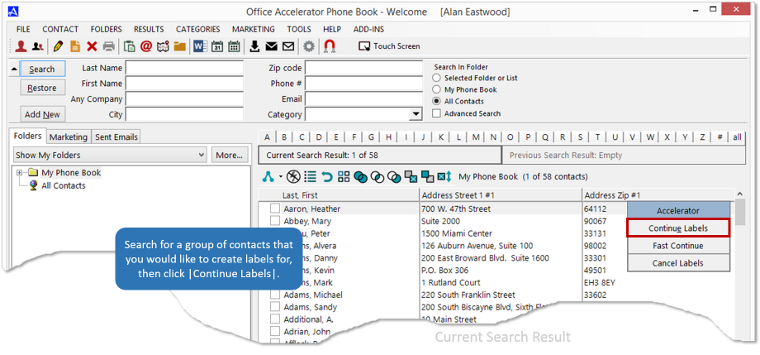
The Accelerator menu will return you to the Accelerator phone book where can search for the contacts you would like to create labels for. Click the |Continue Labels| button to proceed, all contacts in the current search result will be merged to your 'Custom 5160 Labels' document.
-
There are 7 sections in the |Multiple Label Options| screen. The |Multiple Label Options| screen corresponds to the merge fields in your 'Custom 5160 Labels' merge document. In Section - 1, entitled |Label Format| we need to select |Custom 5160 Labels| as this is the merge label document we created above. Section - 3 is used to select the name format you would like on your labels, and we'll be using <Title First Last> which will merge the First and Last name from the phone book to the << name >> field within your labels document. Section - 4 provides options to include within the contact address, in our case Name and Company will be used. Section - 6 can be used to instruct the printer where to begin the labels, for example, if you have a partially used 5160 label sheet you can click a cell in the image instructing Accelerator on what column and row to begin printing as well as select the number of copies, in our case 1. Finally, Section -7 can be used to add a tracking event to each contact a label is created for. The Document Tracking Log can be found in the |Log| tab within a contact or on the Personal Dashboard. Click the |Continue| button to proceed to the next step.
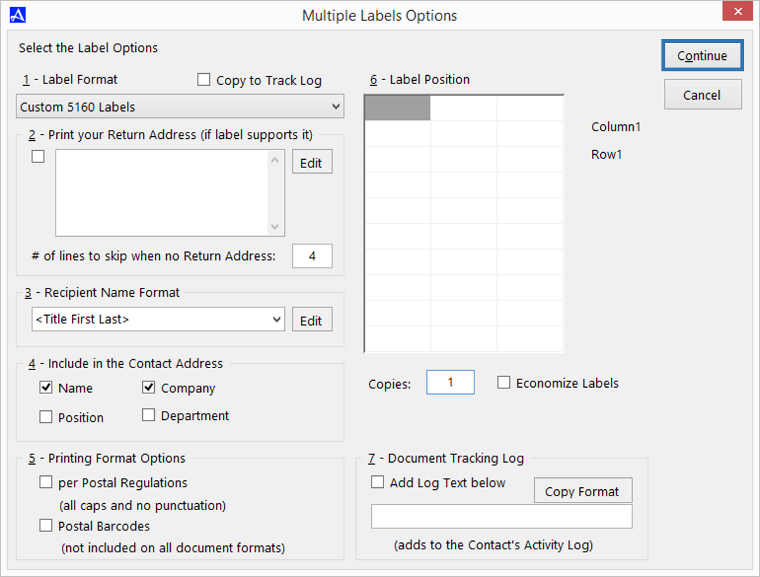 Section - 5 provides options for postal regulation such as printing all caps and adding barcodes, we won't be using Section - 5 with our labels. Postal Barcode fonts are now deprecated and no longer used by the United State Post Office. Section - 2 is used for printing your return address which we will not be using here. Economize labels does not apply to this printout, but would remove the return address on labels where it is included.
 -
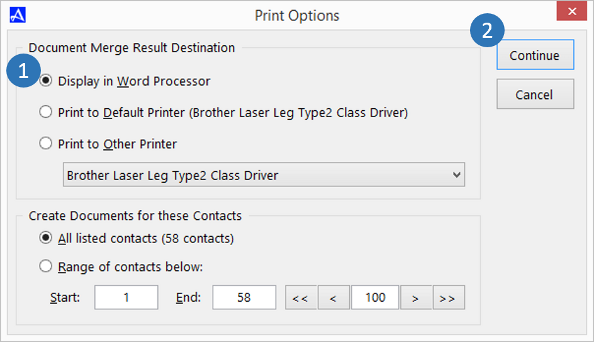
By default, your 'Custom 5160 Labels' will be sent to your word processor. Typically, you'll want to use the |Display in Word Processor| option so you can view your labels prior to printing in the event you need to make changes. You can also print the label document directly to your default printer or select an alternate printer. Accelerator will merge all of the contacts that are in the current search result to your label document, however, you can use the range option and designate a specific range of contacts to merge from the current search result. Make sure the |Display in Word Processor| option is selected and click the |Continue| button.
-
When the merge in complete, your 'Custom 5160 Labels' will be created in Word. Each contact in the current search result will be merged to your 'Custom 5160 Label' where it can then be printed.
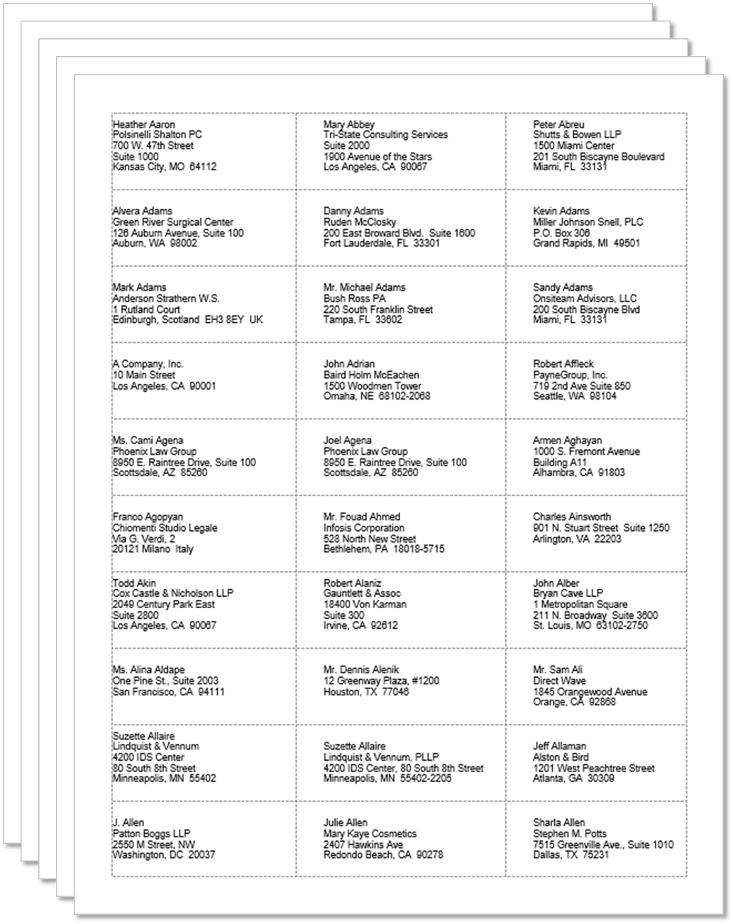 It's recommended that you test print your labels on standard paper prior to inserting your label sheet into your printer. Doing so will help ensure that your label sheets are properly placed in your printer and label output is correct.
Label Formats that Ship with Accelerator
Label Formats that Ship with Accelerator Label Name 3-1/2 Diskette (2-3/4 x 2-3/4) Avery 5096, 5196, 5896 (MACO ML-7500/1/2) - optional graphic 5-1/4 Diskette (1-1/2 x 4) Avery 5097, 5197, 5897 (MACO ML-7600) Address (1-1/3 x 4) Avery 5162, 5262, 5662 (MACO ML-1400/1425) - optional graphic Address (1 x 2-5/8) Avery 5160, 5260, 5660 (MACO ML-3000/3025) Address (1 x 4) Avery 5161, 5261 (MACO ML-2000/2025) - optional graphic Address/Shipping (2 x 4) Avery 5163, 5663 (MACO ML-1000) - optional graphic Address/Shipping (3-1/3 x 4) Avery 5164 (MACO ML-0600) - optional graphic Audio Cassette (1-5/8 x 3-1/2) Avery 5198 (MACO ML-7900) 5198.doc Business Card (2 x 3-1/2) Avery 5371 (MACO ML-8550/1/2/5) 5371.doc File Folder (2/3 x 3-7/16) Avery 5066, 5266 (MACO ML-FF30 to 38) Name Badge (2-1/3 x 3-3/8) Avery 5095, 5395, 5895 (MACO ML-8525) Name Tag (2-1/6 x 3-1/2) Avery 5383, 5883 (MACO ML-5390) Name Tag (3 x 4) Avery 5384 (MACO ML-5392) Post Card (4 x 6) Avery 5389 (MACO ML-8575) Small Address Label (1/2 x 1-3/4) Avery 5267 (MACO ML-8025) Video Cassette Face (1-5/6 x 3-1/16) Avery 5199 (MACO ML-7950) Video Cassette Spine (2/3 x 5-13/16) Avery 5199 (MACO ML-7955) © 1991-2024 - Baseline Data Systems, Inc.