Current Search Result (Label Wizard)
You can use the Office Accelerator Print Labels wizard to print your Contacts to a multitude of label types such as Avery 5160 - Address Sheets. To create and print labels for a list of contacts in Office Accelerator, follow the directions below.
-
Search for a group of contacts that you would like to create labels for.
-
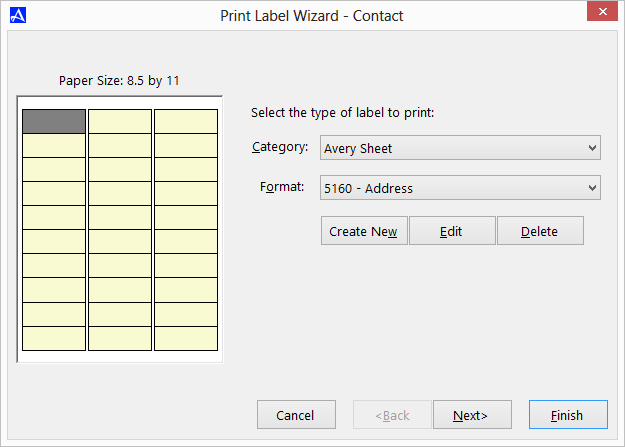
From the |File| menu in the phone book, select |Print Labels|Current Search Result|. Select the appropriate label sheet for your print job using the |Category| and |Format| drop down menus. For example, if you are using an Avery 5160 Sheet of labels, you would select |Avery Sheet| from the |Category| drop down list and |5160 - Address| from the |Format| drop down list. After making your selections, click the |Next| button to proceed through the wizard.
-
By default, Office Accelerator will print the first address of each contacts Full Name, Street 1, Street 2, City, State, and Zip (CSV). You can add additional address values such as company, department and country by checking the box next to the address value. If your contacts contain a second address value such as Business, you can change the label address number by incrementing the numeric address value. You may also manually enter the address type value which will instruct the labels wizard to print labels for addresses with the value you entered. For example, to print labels for contact addresses containing an address type value of Business, select the |Use Address Type| option and enter the value 'Business' (not including ''). Click the |Next| button to proceed through the wizard. Click the |Next| button to proceed through the wizard.
Selecting the |Format per Postal Regulations| will capitalize address text and remove punctuation values per postal regulations. Selecting |Include POSTNET Barcode| will add a barcode to your label which can be used to obtain discounts rates on bulk mailings in some regions.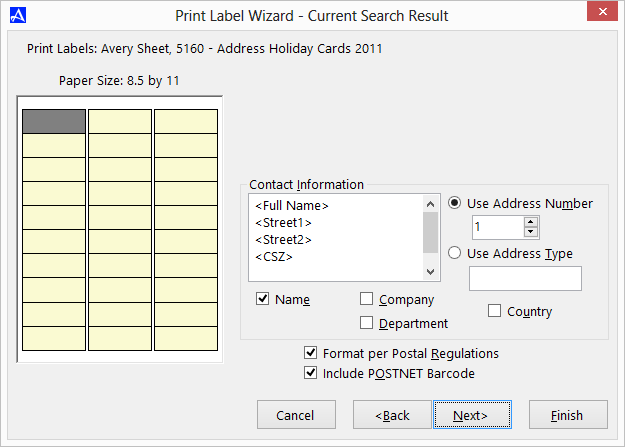
-
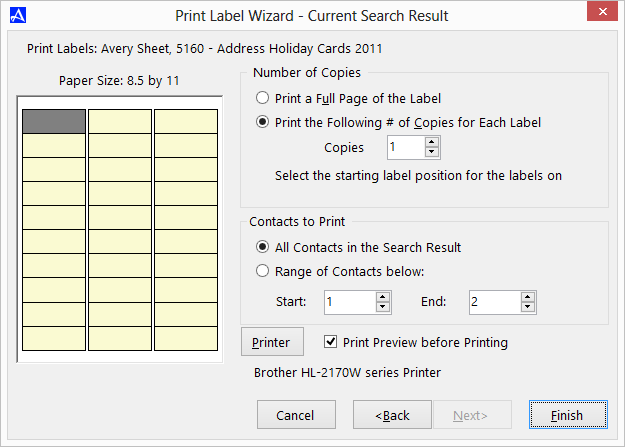
The final screen of the print label wizard provides options on the number of label copies to print. You can print a full sheet of labels or multiple copies of each label by incrementing the |copies| value. If you prefer to print just a range of contacts within your current search result, select the |Range of Contact below| option and enter a |Start| and |End| range. To begin printing your labels, be sure to load your label sheet in the destination printer and verify that the correct printer has been selected. You can change the destination printer by clicking the |Print| button and selecting an alternate printer. Once you have made your selections, click the |Finish| button to create your labels.
If you are printing to a used 5160 sheet, you can select which label Office Accelerator should begin printing on by clicking the specific label start point on the graphic to the left of the label wizard. You can preview your labels by selecting the |Print Preview before Printing| check box, if you're satisfied with the print preview, click the print icon on the print preview tool bar to send your print job to the printer.