Accelerator Menu Add-In Custom Field
The Office Accelerator Macro Custom Fields Utility is used to map fields in the Office Accelerator phone book for mail merge. Used in conjunction with the Office Accelerator Macro Suite, this utility provides the ability to map up to 160 Office Accelerator fields for merging to custom Word or WordPerfect documents. To map your custom fields, follow the directions below:
-
Login to the Office Accelerator phone book and select |File|Administrator|Accelerator Menu Add-In Custom Fields|.
-
From the |Custom Merge Fields| screen, select the phone book field (left) that you would like to map to the custom field on the right. Next, select the custom field (right) that you would like to map the phone book field to, and click the |Map| button. Click |OK| to save your settings.
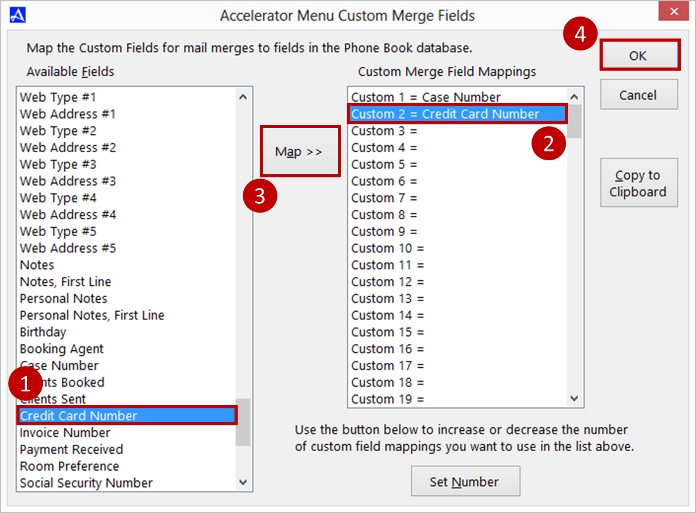 You can use the |Copy to Clipboard| button shown above to copy the mapped custom fields to your clipboard where you can paste them to notepad or a word document for reference when creating your custom documents. This is especially helpful as the |Insert Merge Field| option in Word displays the custom field number, but does 'not' display the Accelerator field value to which they are mapped. Having this reference will provide the mapped custom field information.
 -
To use the newly mapped custom fields, open Microsoft Word, and click the |Add-Ins| tab. From the |Add-Ins| tab, click |Accelerator|Create or Edit|Letter Format|.
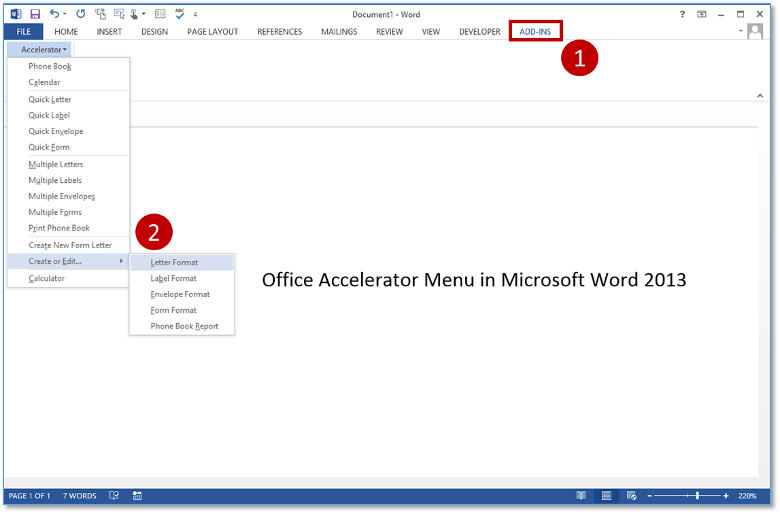 If you can't find the Accelerator menu, you might need to install it. From the Office Accelerator phone book, select |Add-Ins|Enable Add-Ins| and select |Accelerator Menu in Microsoft Word|. Now click the |Add-Ins| menu again and select |Install/Remove the Accelerator menu in Microsoft Word|.
 -
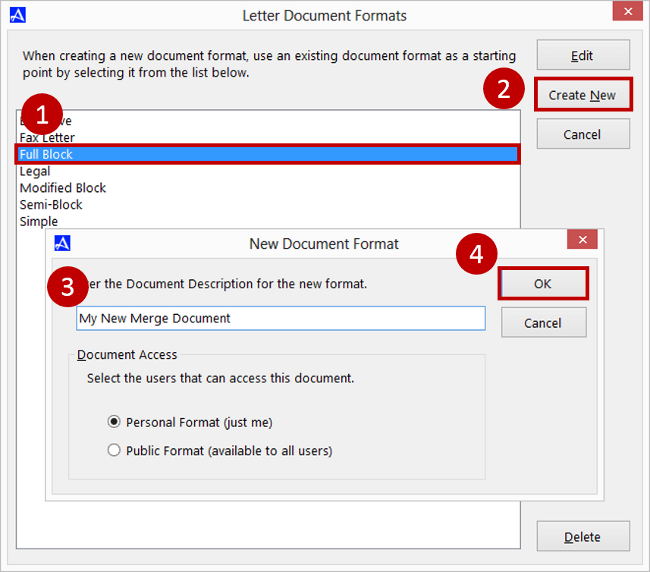
From the |Letter Document Formats| dialog box, select any of the pre-formatted documents as a starting point and click the |Create New| button. Enter a name for the new merge document and click |OK|. In this example, we've selected the |Full Block| format.
-
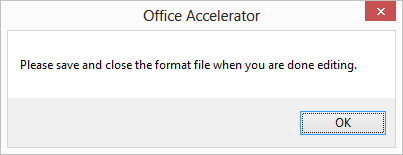
You will be prompted to save and close the merge document when you are done editing it, do not rename the document when you save it. Click |OK| to continue to the merge document.
-
The Office Accelerator merge document can now be edited as you would any word document but now includes merge fields corresponding to the data fields within Office Accelerator. You can add and delete merge fields using the |Insert Merge Fields| button located under the |Mailings| tab within Microsoft Word. Once you are done editing your merge document, click the |Save| button in Microsoft Word and close the document.
Do not change the name or location of the merge document when saving your changes.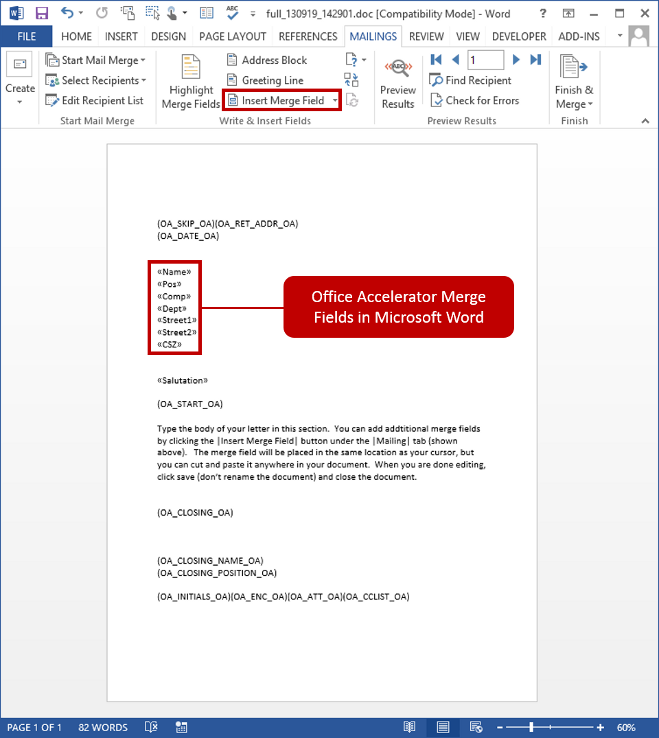
-
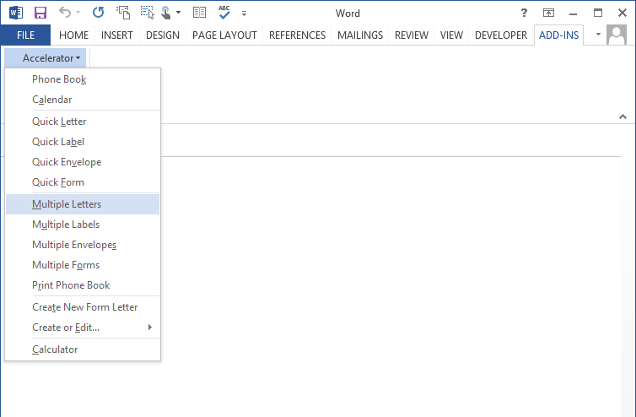
To use the merge document that you created, open Microsoft Word. Select the |Add-Ins| tab and click |Accelerator|Multiple Letters|.
-
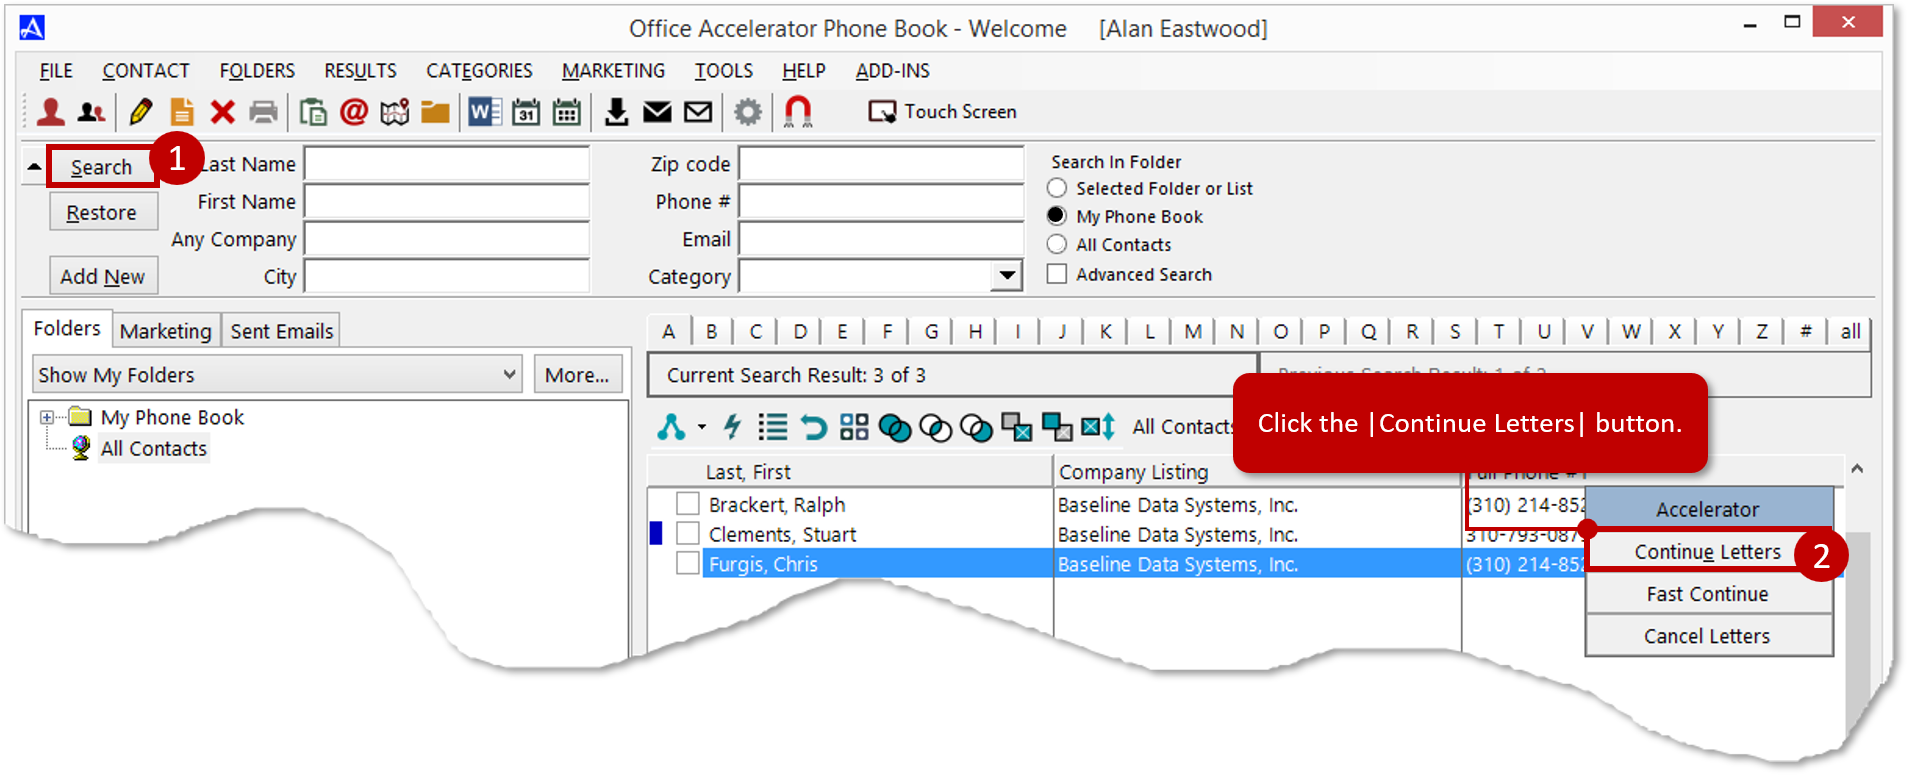
From the Office Accelerator phone book, search for a group of contacts. These will be the contacts that you are sending to your merge document. Click the |Continue Letters| button.
-
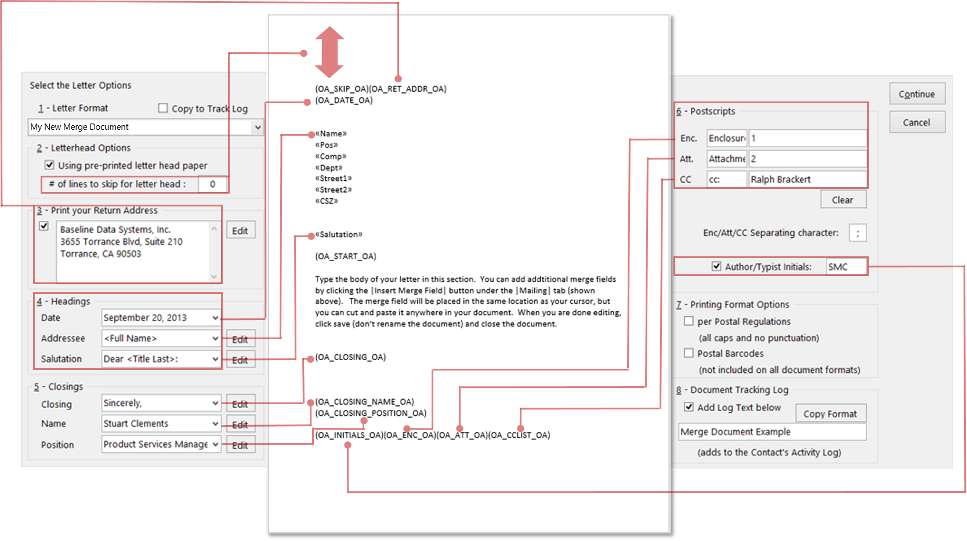
From the |Multiple Letters Options| dialog box, select the options you wish to include in your merge document. By default, the last created or edited document will be selected in the list (step 1). Click the |Continue| button to continue through the merge.
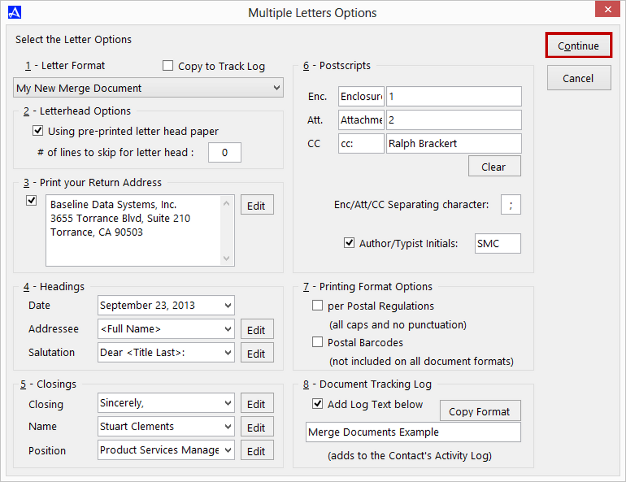 The options screen selections correspond to merge and substitution fields within your merge document.
-
From the |Print| options dialog box, select the |Continue| button. By default, Accelerator will merge the entire search result to your word processor.
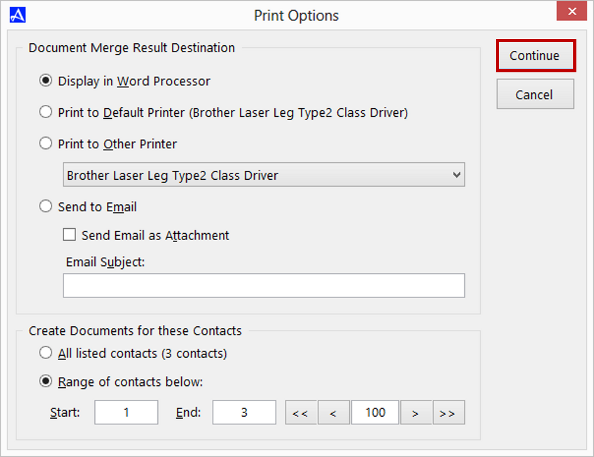 You can also send the merge document to your printer, or via email to Microsoft Outlook 2010 or higher. Optionally, you may also choose a range of contacts to merge as opposed to the entire search result.