Current Search Result
To print an entire group of contacts (the current search result) within the Office Accelerator phone book, do the following:
-
Search for a list of contacts that you would like to print. You can search for and create a custom list of contacts to print by searching and merging your lists together. For example, search for your first contact by first and last name, then do the same for the second contact. To merge the two contacts into one list, click the |Results| menu and select |Merge All of Previous with Current Result|. Doing so will merge your previous search with your current. To add more contacts to your print list repeat the search and merge function.
-
From the |File| menu within the Office Accelerator phone book, select |Print Wizard|Current Search Result|.
-
From the |Print Wizard| dialog box, you may select the paper type and format for use with your printout. By default, Office Accelerator will start with a generic 8.5 X 11 inch paper selection. You can select different paper types from within the |Category| drop down list; to change the paper format, select an option from within the |Format| drop down list. Click the |Next| button to proceed through the print wizard.
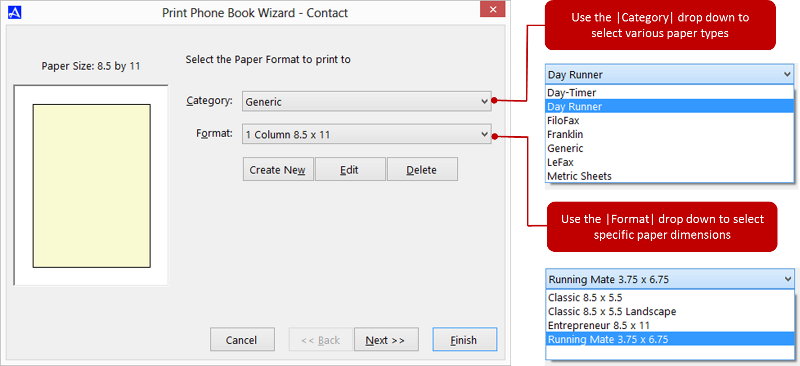
You can create custom Print Wizard templates as well. Custom templates can include user defined paper dimensions, margins, merge fields and custom font size and type values. For more information, see Creating a Custom Print Wizard template .
-
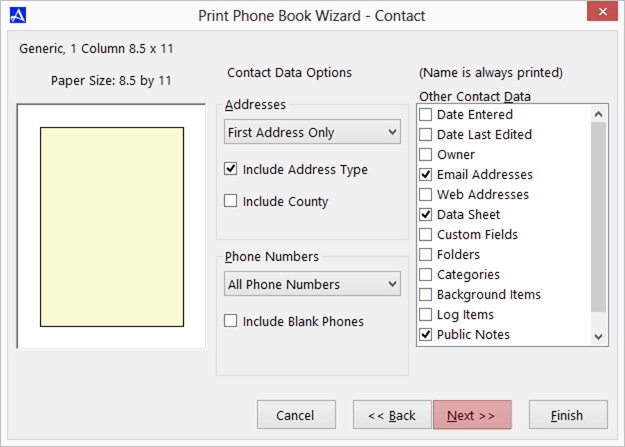
Select the contact information you would like included in your printout and click the |Next| button to continue.
-
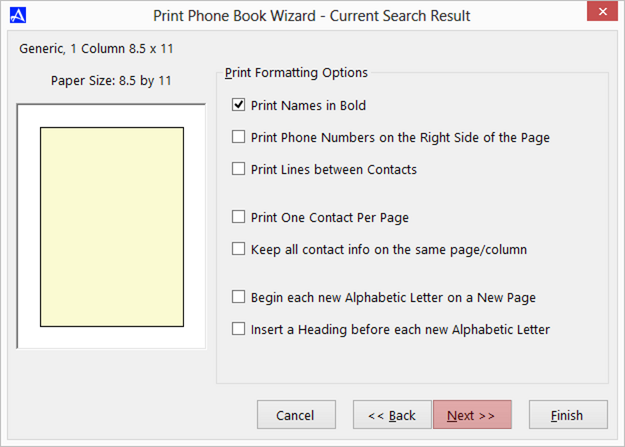
Select the formatting options for your printout, e.g. printing names in bold etc. Click the |Next| button to proceed through the print wizard.
-
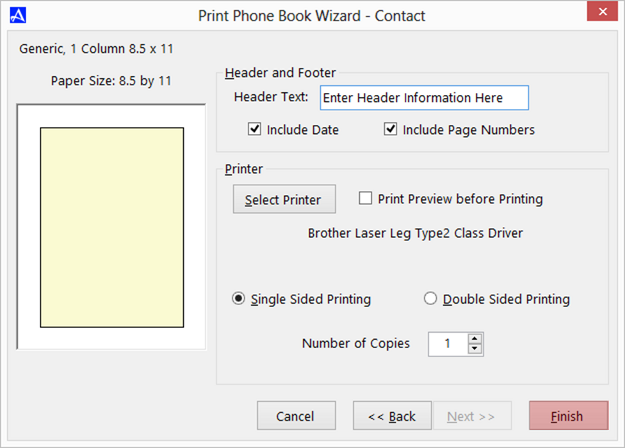
On the final screen, you may select header and footer options as well as single and double-sided printing. You may also choose the number of copies to print out, print preview options, and which printer to send the print job to. Click the|Finish| button to begin printing.
For more information on building a custom list of contacts within the Office Accelerator phone book, see Creating a Custom List of Contacts.